Design
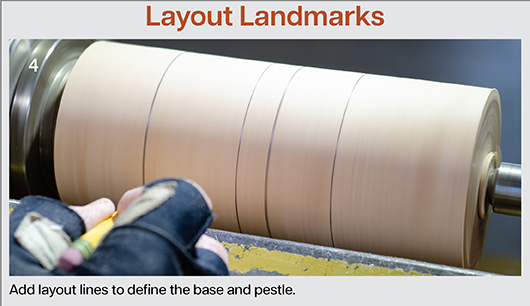
There are many videos online demonstrating turning a seed pot press, as well as many sites selling presses. After reviewing a number of these sources, I could find only two measurements, but they are the critical ones. I laid out lines on my blank to decide how the project should proceed. Measuring from the bottom, I marked lines at 2" (5cm) and 3" (8cm)—these are the key measurements for making the pots (Photo 4). Then I added a 1/2" (13mm) and drew another line (the top of the cylinder), then added another 1-1/2" (4cm) for a knob at the top of the pestle. This left me with a little less than 2" of stock between the pestle and the tenon—plenty for the base.
Shape The Pestle
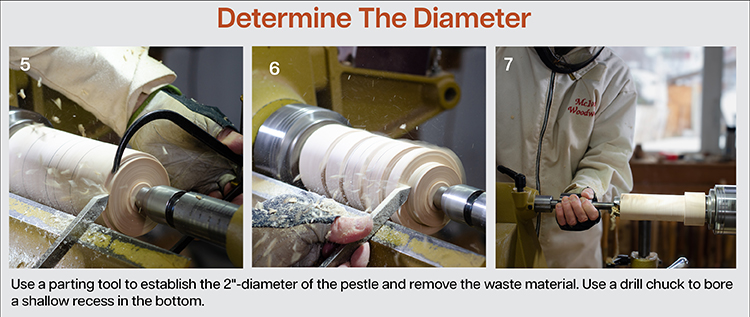
I want to make 2"-diameter seed pots, so I set my caliper at a fraction over 2" and use my parting tool to reduce the pestle (Photos 5, 6). I leave the base section of the blank at its full diameter for the moment. I use a 1/2" spindle gouge to refine the cylinder. A skew chisel would typically be my preference, but the piece of ash I picked up has a lot of grain reversal and is prone to tearout; in this rare instance, the spindle gouge is yielding a better surface.
With the aid of a drill chuck, I bore a 1/4"-deep (6mm), 1-9/16"- (4cm-) diameter hole in the bottom (Photo 7). Again, this diameter isn’t critical, but whatever bit you have at hand should leave you with a rim around the recess that is between 1/8" and 1/4"-thick. This simple endgrain hollowing exercise could also be accomplished—and probably more quickly than drilling—with a flat scraper.
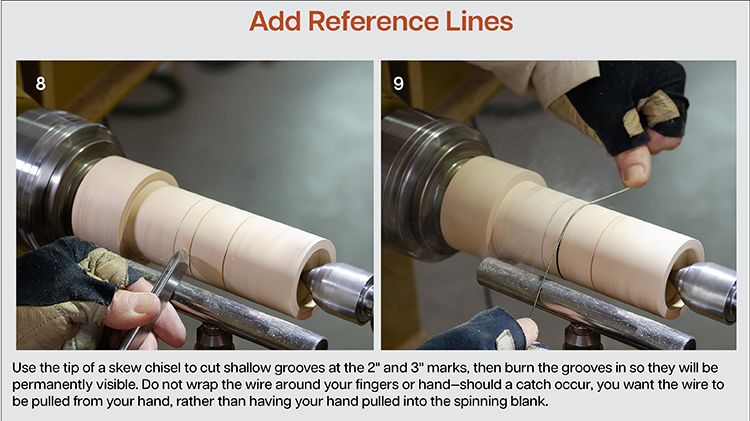
With the tailstock brought back up for support, I relocate my landmarks and use the toe of the skew chisel to cut a shallow groove at the 2" and 3" locations (Photo 8). I emphasize the grooves by burning them in with a wire (Photo 9).
A piece of guidance I came across while researching this project suggested turning a slight taper from the 2" mark to the bottom of the pestle. I second this guidance, as doing so will make it easier to remove completed seed pots.
Shape The Knob
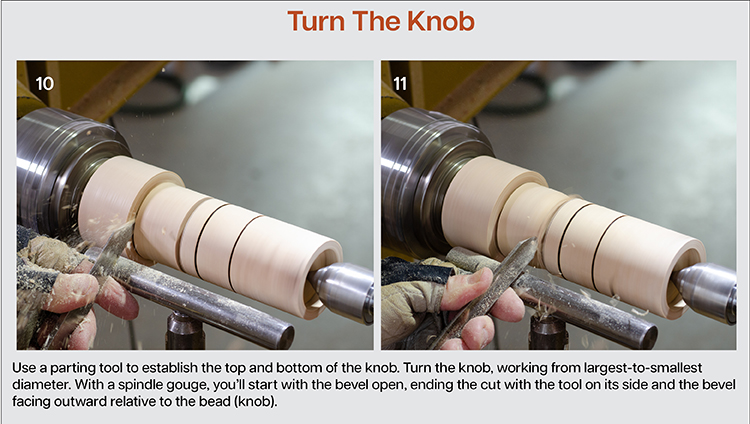
I use a narrow parting tool to define the top and bottom of the knob (Photo 10). The base of the knob is about 1" in diameter, but again, this is not critical—you just need to be able to sneak your fingertips under the knob in use.
I shape the knob with my spindle gouge, cutting from the center (largest) down into the parting tool cuts on either side (Photo 11). The goal here is to shape a large bead that will feel comfortable nestled in the palm of the hand.
Finish—Or Not
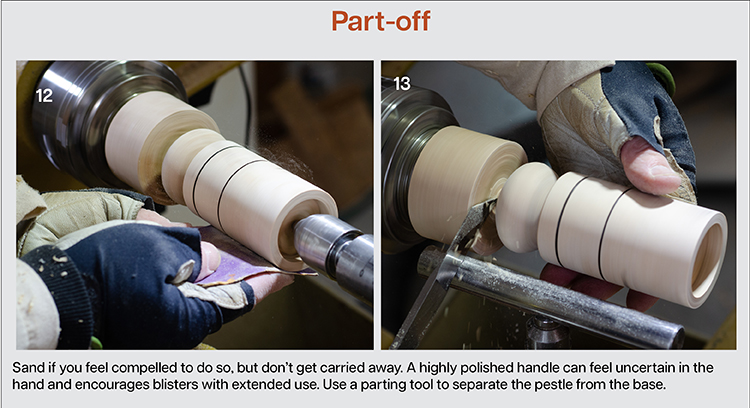
This tool will work for a living at my house and it doesn’t need to get gussied-up for the job. I give the pestle a quick once-over with 150-grit abrasive to remove some less-than-stellar tool work, and that’s it (Photo 12). If you’re making these for a gift or perhaps to market, you may want to go a step further, but I wouldn’t sand past 220-grit. An oil finish—which can be easily renewed by the recipient—would be my suggestion.
With the narrow parting tool, I separate the pestle from the base, catching the pestle with my left hand as it comes free (Photo 13). I sand away the nub at the top, blending the tenon remnant with the surrounding surface.
Turn The Base
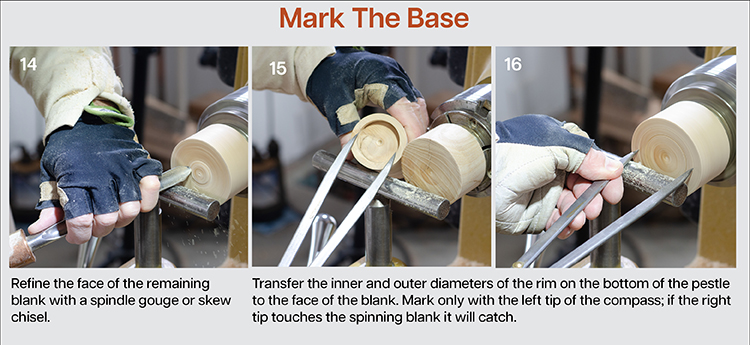
I use my spindle gouge to clean-up the top of the base, using a shear-cut (Photo 14). The objective here is to cut a channel in the top of the base to receive the rim that protrudes from the bottom of the pestel (Photo 15). I transfer both the inner and outer diameters of this rim to the base (Photo 16).
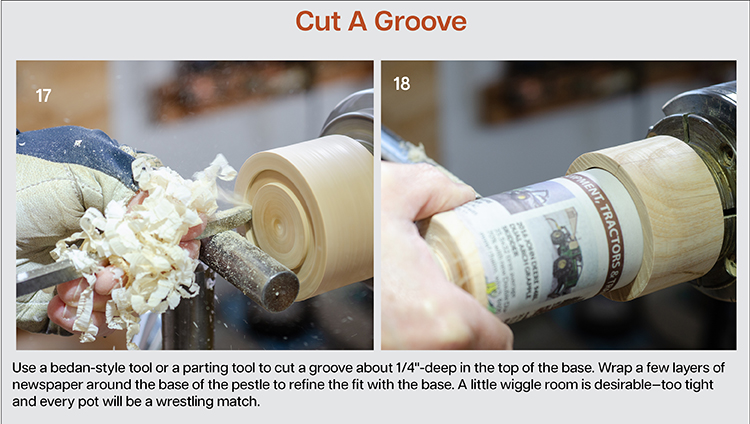
I use a narrow square-end scraper—more like a bedan—to cut the channel (Photo 17). This is a shopmade tool from a piece of 1/4"-square stock high speed steel. A parting tool will also work.
I check the fit. I know I don’t want this connection to be too tight (Photo 18). The press works by applying pressure to the folded newspaper trapped between the pestle and the top; a tight fit here will only create frustration. I add a few wraps of newspaper to the pestle, then expand the width of the channel until the pestle with its paper wrap moves in and out of the base without force or binding.
Refine The Bottom
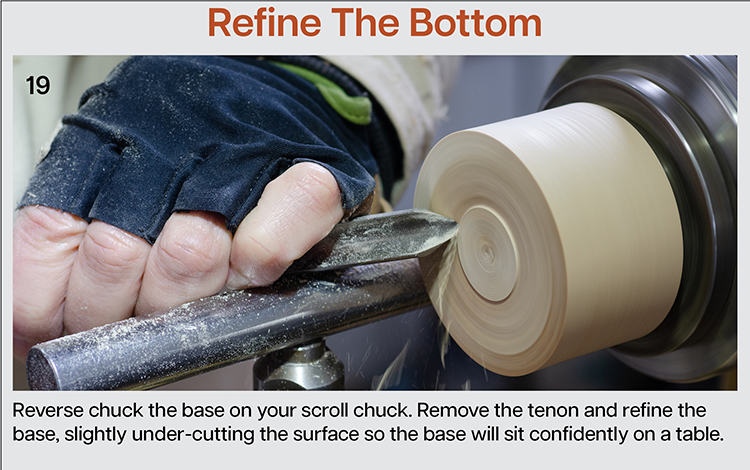
Conveniently, the recess cut into the base is perfect for reverse-chucking (Photo 19). I refine the underside, removing the tenon and slightly under-cutting the bottom.
Make A Seed Pot
Time to quit fooling around and get to work. Use the 3" mark on the pestle to layout and cut or tear a strip of newspaper (Photo 20).
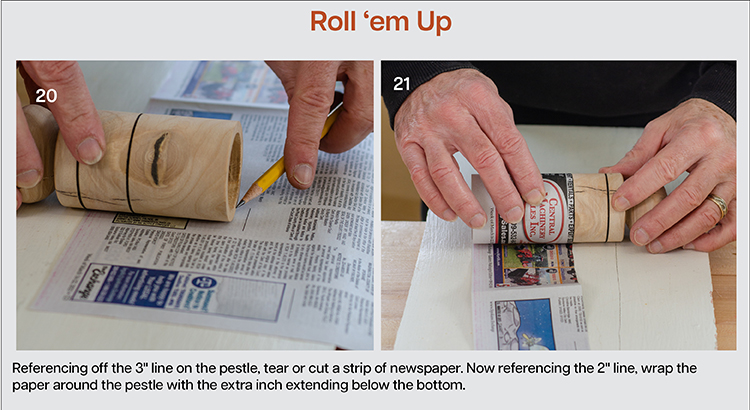
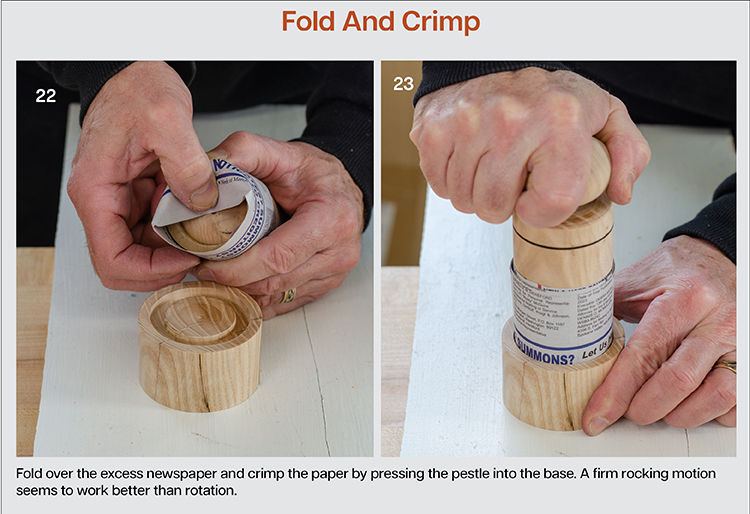
Referencing off the 2" mark, roll-up the newspaper around the pestle base (Photo 21). Fold the inch-or-so that extends beyond the pestle base over to cover the bottom (Photo 22).
Press the pestle into the base to crimp the folded newspaper (Photo 23). I find that a rocking motion with a bit of force works best, rather than twisting, which tends to rub through the paper.
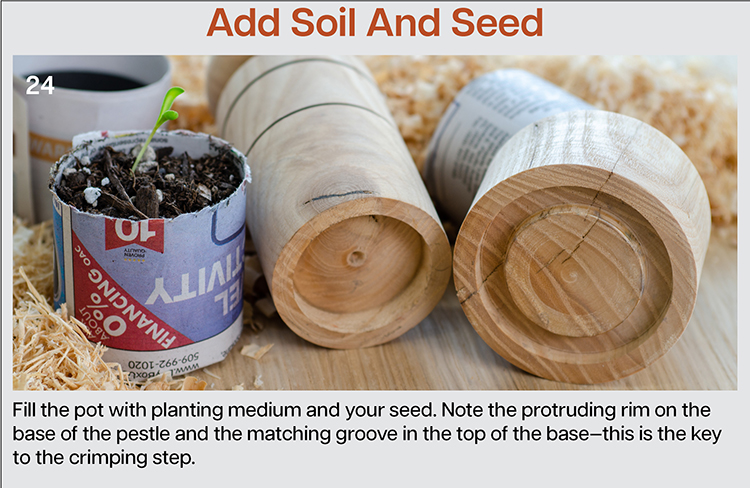
Slide the seed pot off the pestle and add soil (Photo 24). If you turned that slight taper on the pestle, the seed pot should slide off easily. If not, you may want to wrap the next one a little loosely.
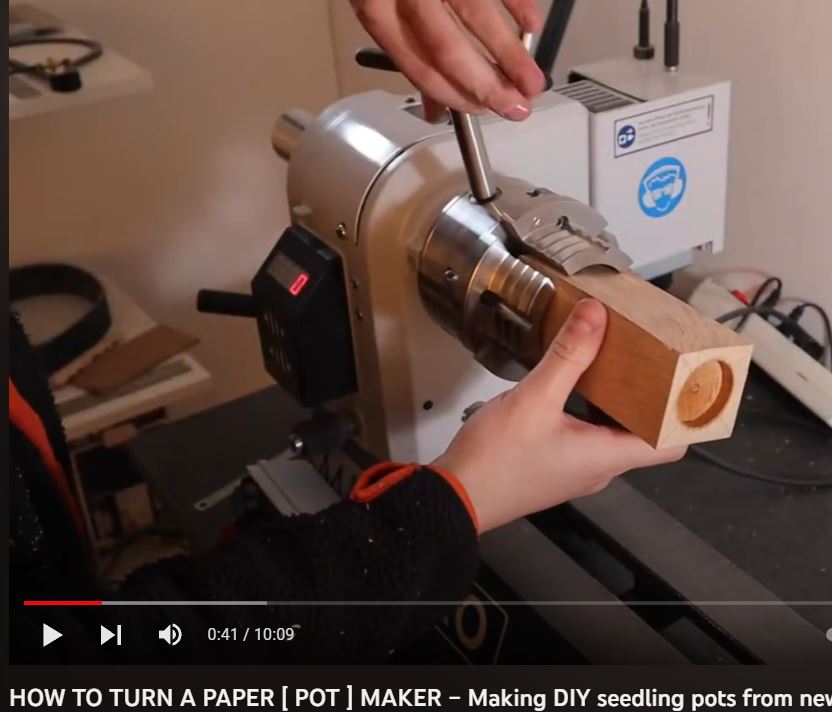
There are many variations on this project demonstrated online. This video will get you started:
About the Author:
Don McIvor gardens on glacial outwash in North Central Washington. He is the editor of Woodturning FUNdamentals.